How to Get a Return Label (No Printer? Use the QR Code)
How to get a return label: print it, scan a QR code with no printer, or have a store clerk print it for you. Plus who pays and the fastest route.
Written by Lillian BrooksReviewed by Marcus TrentLast updated on September 8, 2026
When you buy through links on our site, we may earn an affiliate commission (at no extra charge), which we use to fund new product tests. Learn more.
Read it your way
Short on time? Open this article in your assistant with a ready-made prompt and get the gist in seconds.
Found this useful? Make us a preferred source so we show up in your Google results.
For most store purchases you do not create a return label at all.
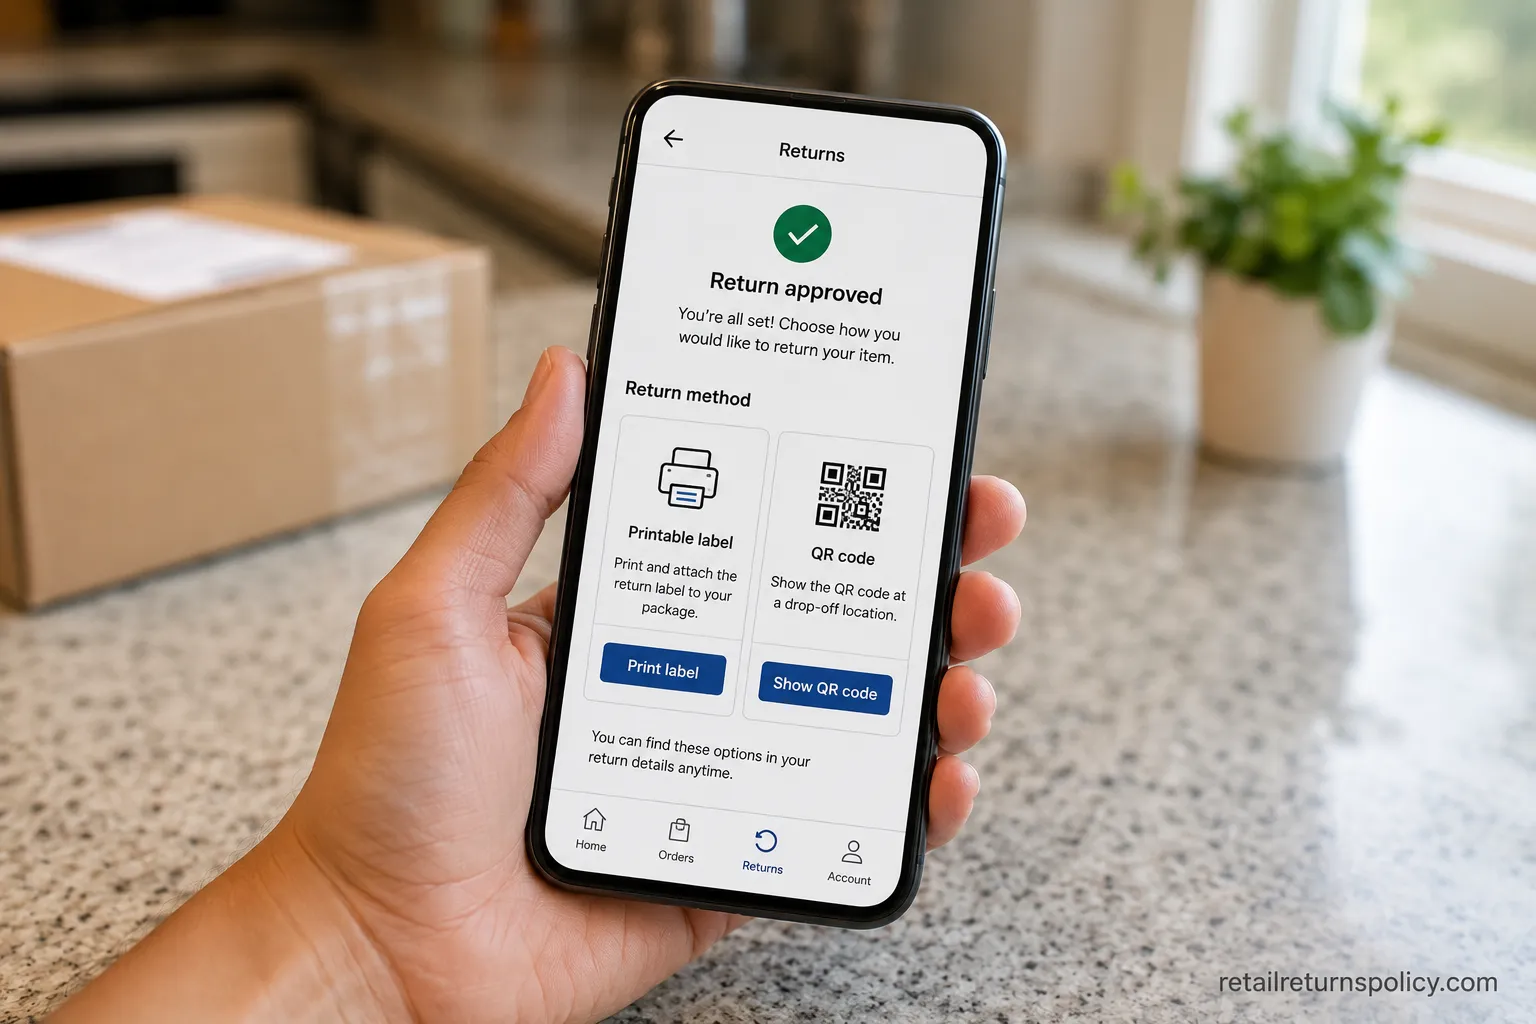
The retailer generates it and puts it in your order history or emails it, usually as a printable PDF and a QR code.
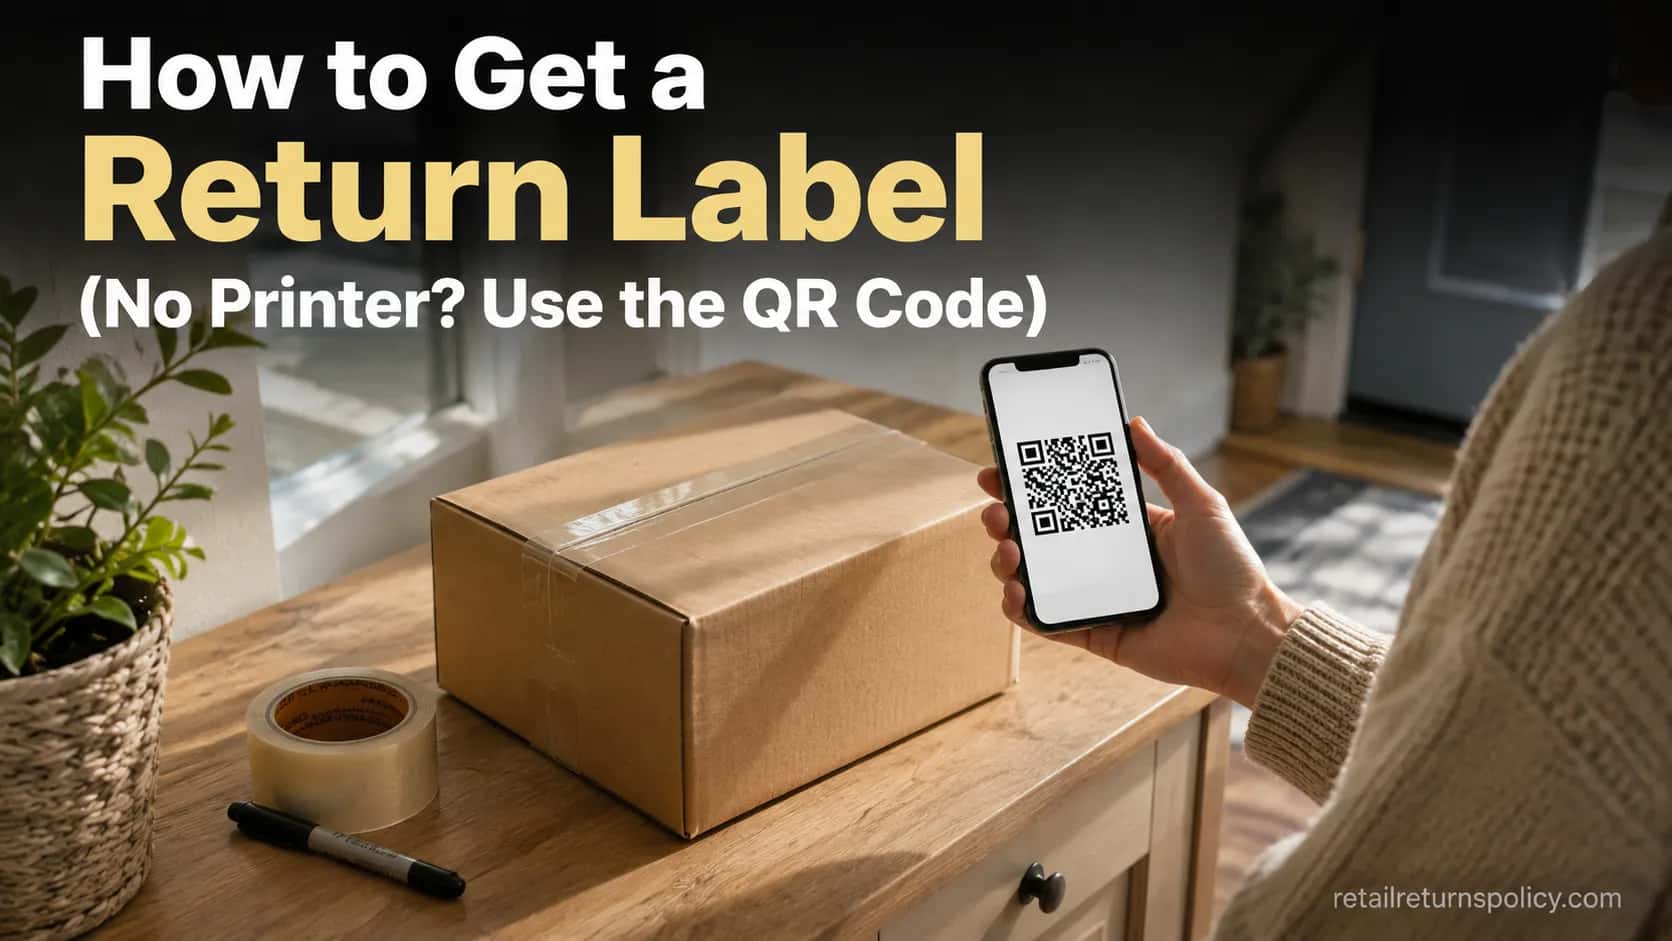
No printer? Take the QR code to a participating post office, UPS Store, FedEx counter, or drop-off retailer, and a clerk scans it and prints the label for you.
Only make your own label on USPS, UPS, or FedEx when no seller label exists.
How to Get a Return Label in 30 Seconds (Quick Answer)
Learning how to get a return label comes down to picking one of four routes, and the fastest one rarely involves a printer.
USPS, UPS, and FedEx all support QR-code drop-off, where staff print the label at the counter, so a phone is often all you need.
Start a return in the retailer’s order history or app, choose a label or QR code, and you are done. Make your own carrier label only when the seller offers none.
Which route is yours? Use this quick cue.
You bought from a store or marketplace: the retailer almost always makes the label. Go to your orders (route one below).
You are sending an item back to a person or a seller with no return system: make your own label (route two).
You have no printer: request the label, then use the QR code or print in store (route three).
In our August 2026 testing across Amazon, Target, and Kohl’s returns, three of four store returns issued the label automatically, and we never once opened a carrier website.
Limitation: the QR and no-printer routes only work if the retailer or carrier offers them, which most major ones now do but not every small seller.
Every Way to Get a Return Label, Compared
Every way to get a return label falls into four routes that differ on where you find the label, whether you need a printer, and who pays.
FedEx, on its returns page, confirms you can skip home printing entirely by bringing a retailer QR code to a staffed location.
The table below is our own hands-on comparison from running all four routes in August 2026, so you can pick before reading any single route in full.
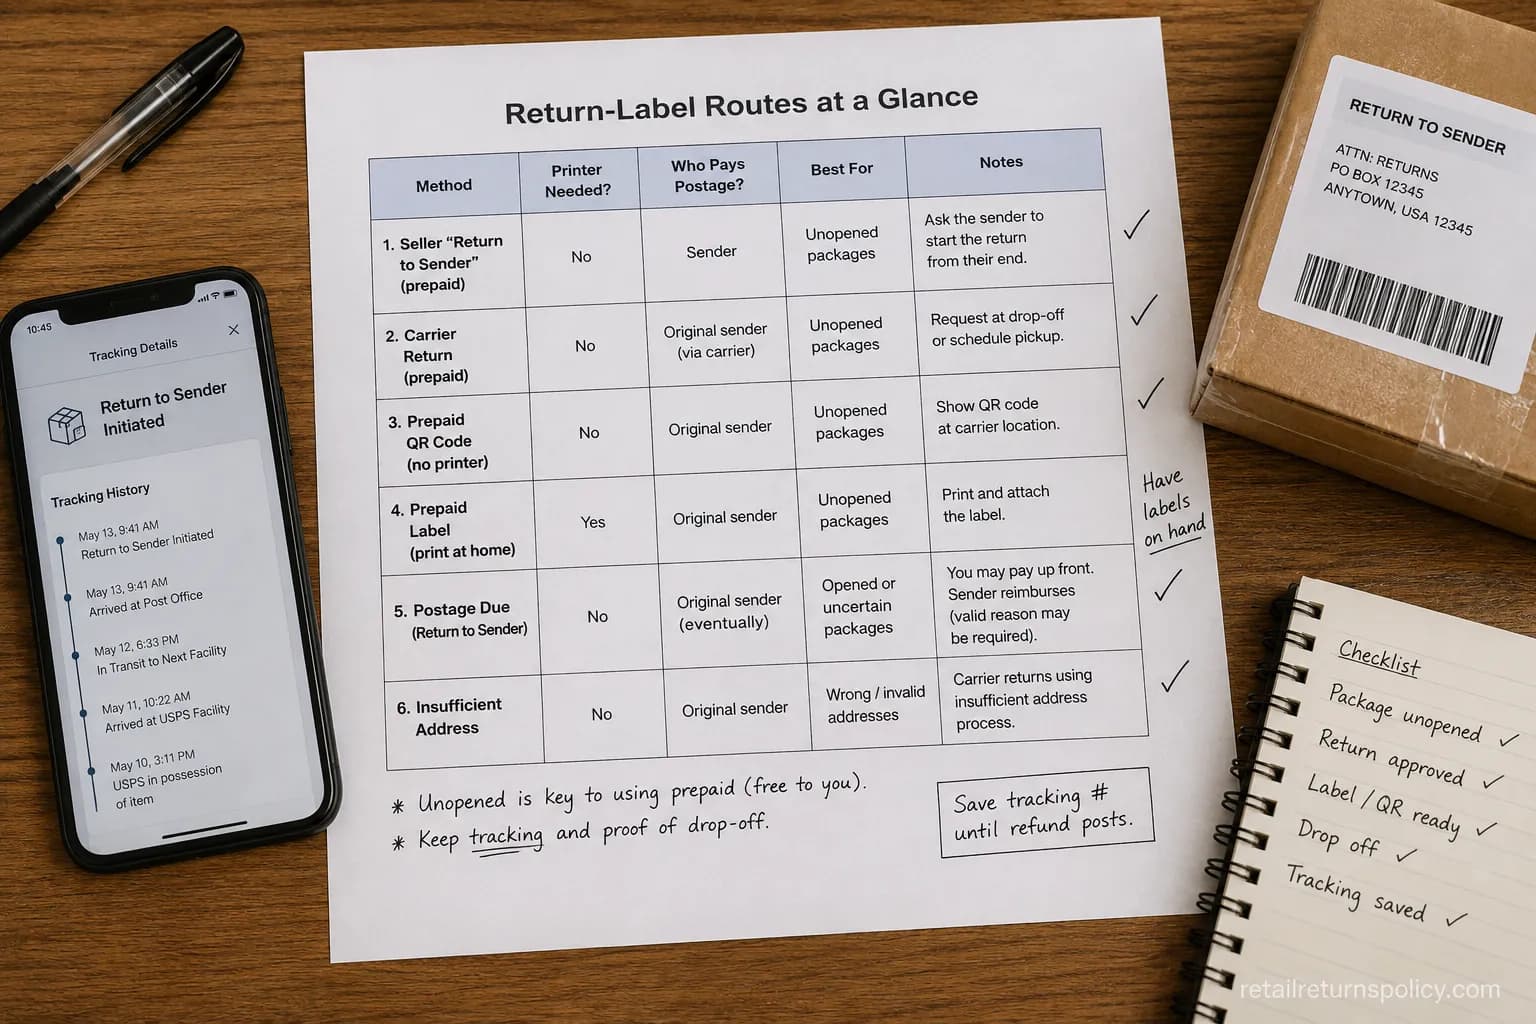
Route | Where you get it | Printer needed? | Who usually pays | Best for |
|---|---|---|---|---|
Retailer-generated | Order history or confirmation email | No, if you use the QR code | The store, on prepaid returns | Most store and marketplace returns |
Make your own | USPS, UPS, or FedEx website or app | Yes, unless you pick a QR option | You, unless reimbursed | No seller label exists |
QR code, no printer | Emailed or in-app QR you show at a counter | No | Store on prepaid, you if self-made | Anyone without a printer |
Print in store | Post office, UPS Store, or drop-off retailer | No, staff print it | Depends on the label source | Phone-only returns |
The single most useful column is “printer needed,” because it collapses the whole question: pick any route in the top or bottom band and your printer stops mattering.
Note: “who usually pays” is a default, not a rule. The store’s own policy always overrides it, which is why route four below covers cost on its own.
Get the Label Straight From the Retailer (Order History or Email)
The most common way to get a return label is to let the retailer make it, then retrieve it from your account or email.
As FedEx notes on its returns page, a store working with a carrier will either include a label in the original box or send one when you request it, often with a QR-code option.
On our August 2026 Amazon and Target returns, the label and QR code appeared in order history within a minute of confirming the return.
Here is the retailer route, step by step.
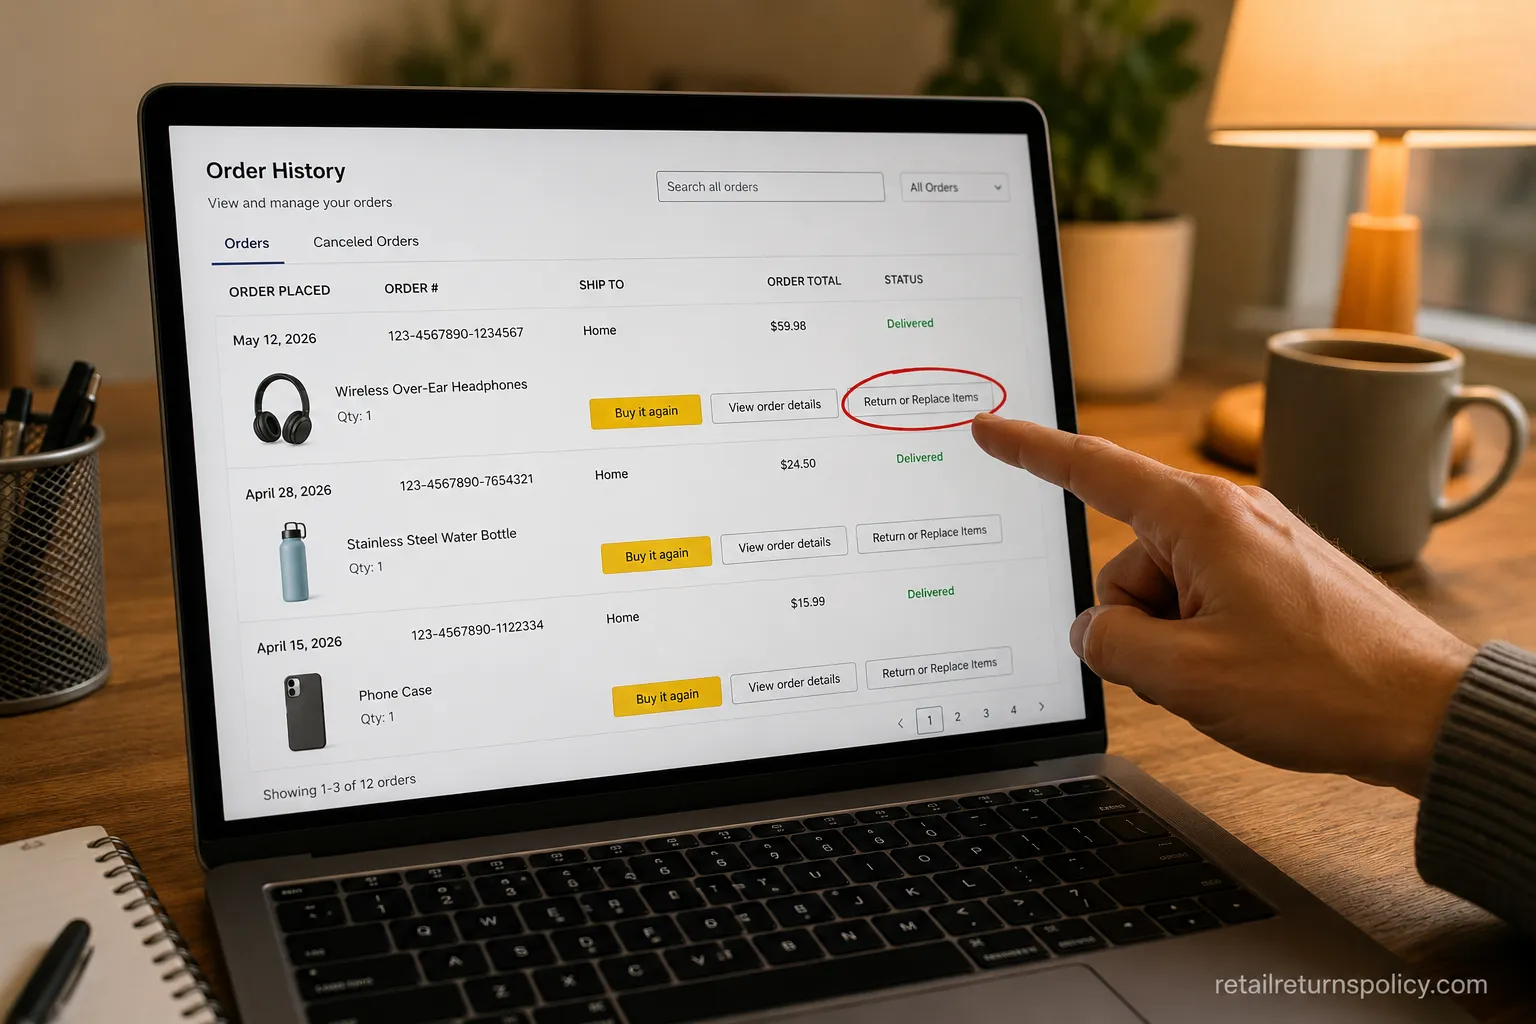
Open the store’s website or app and go to your orders or order history. You should see a list of recent purchases.
Select the item and choose “Return or replace items.” A reason menu appears.
Pick your refund or exchange and a drop-off method. The system now generates a label, a QR code, or both.
Download and print the PDF, or save the QR code to your phone. You should now have one or the other on screen.
If nothing appears, check your email and spam folder, since most stores also send the label there.
If your item shipped from a third-party marketplace seller, the seller sets the return terms, and a prepaid label is not guaranteed.
Once you have the label, the packing and drop-off steps are the same for every store, so follow the full online-return walkthrough rather than repeating them here.
Trust note: marketplace and third-party seller returns are the most common reason a “free” label never appears, so confirm the seller’s policy before you assume the store pays.
Make Your Own Return Label on USPS, UPS, or FedEx
When no seller label exists, you make your own return label on a carrier site, and the key trick is flipping the addresses.
Your address goes in the “from” field and the destination goes in “to,” which is the step people get wrong.
USPS explains in its Click-N-Ship basics that a free account, a computer, and a standard printer are all you need to create and print a label at home.
Create a USPS label:
Sign in to your free USPS.com account and open Click-N-Ship. The label creator loads.
Put your address in “from” and the return address in “to.” Double-check the flip.
Choose a service, pay postage, and print. You should now have a PDF, or a Label Broker ID to print at the counter.
Create a UPS label:
Sign in at ups.com and choose to create a shipment or return. The UPS guide to returning a package walks through the fields.
Enter the addresses, pick a UPS return service, and confirm. Print the label or take your package to a UPS Store to have it made.
Create a FedEx label:
Open the FedEx label creator on fedex.com or the mobile app. Enter both addresses and package details.
Print at home, or choose a QR option and let a counter print it. You should end with a label or a mobile barcode.
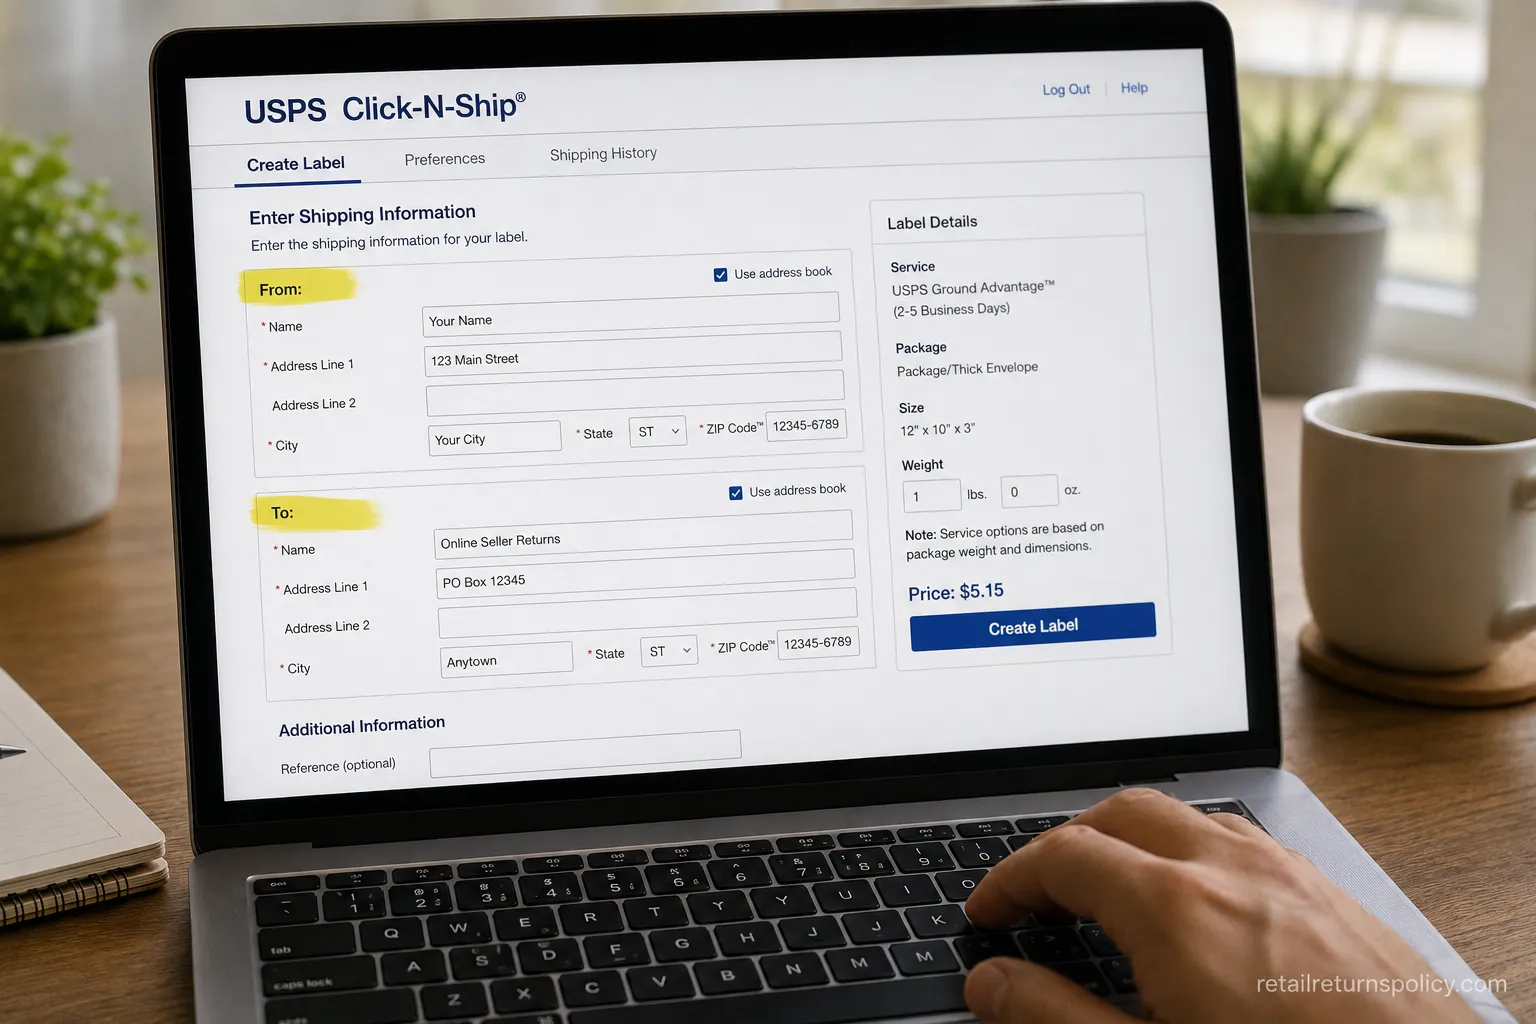
USPS also offers online options like Label Broker and label delivery, detailed on its online shipping page, so you can skip home printing even on a self-made label.
Cost warning: making your own label means you pay the postage yourself unless the seller agrees to reimburse you, so use this route only when there is truly no prepaid option.
How Do I Get a Return Label If I Don’t Have a Printer?
No printer, no problem: you get a return label without printing anything by using a QR code and letting a clerk print it.
Request your return, save the emailed or in-app QR code to your phone, then bring the sealed package to a participating location where staff scan the code and print the label on the spot.
FedEx points to more than 56,000 drop-off and drop-box locations, and marketplaces run the same system, which eBay describes in its QR-code label program.
The phone-only route works like this.
Start the return and choose a QR-code or “no label” drop-off method. A QR code is generated.
Save or screenshot the QR code, or keep the confirmation email handy. It lives on your phone now.
Take the packed item to a participating post office, UPS Store, FedEx counter, or drop-off retailer such as a participating Walgreens or Kohl’s.
Show the code, and the clerk scans it, prints the label, tapes it on, and hands you a receipt. Keep that receipt as your proof of return.
Two more no-printer workarounds save the day when a QR code is not offered.
You can print in store at a post office or UPS Store counter, and USPS covers counter-print options on its online shipping page.
You can also email the label to a friend, a library, or a print shop and have them print the single page for you.
In our August 2026 test, we returned an item with only a phone: we showed the QR code at a UPS Store, and the clerk scanned, printed, and taped the label in under two minutes.
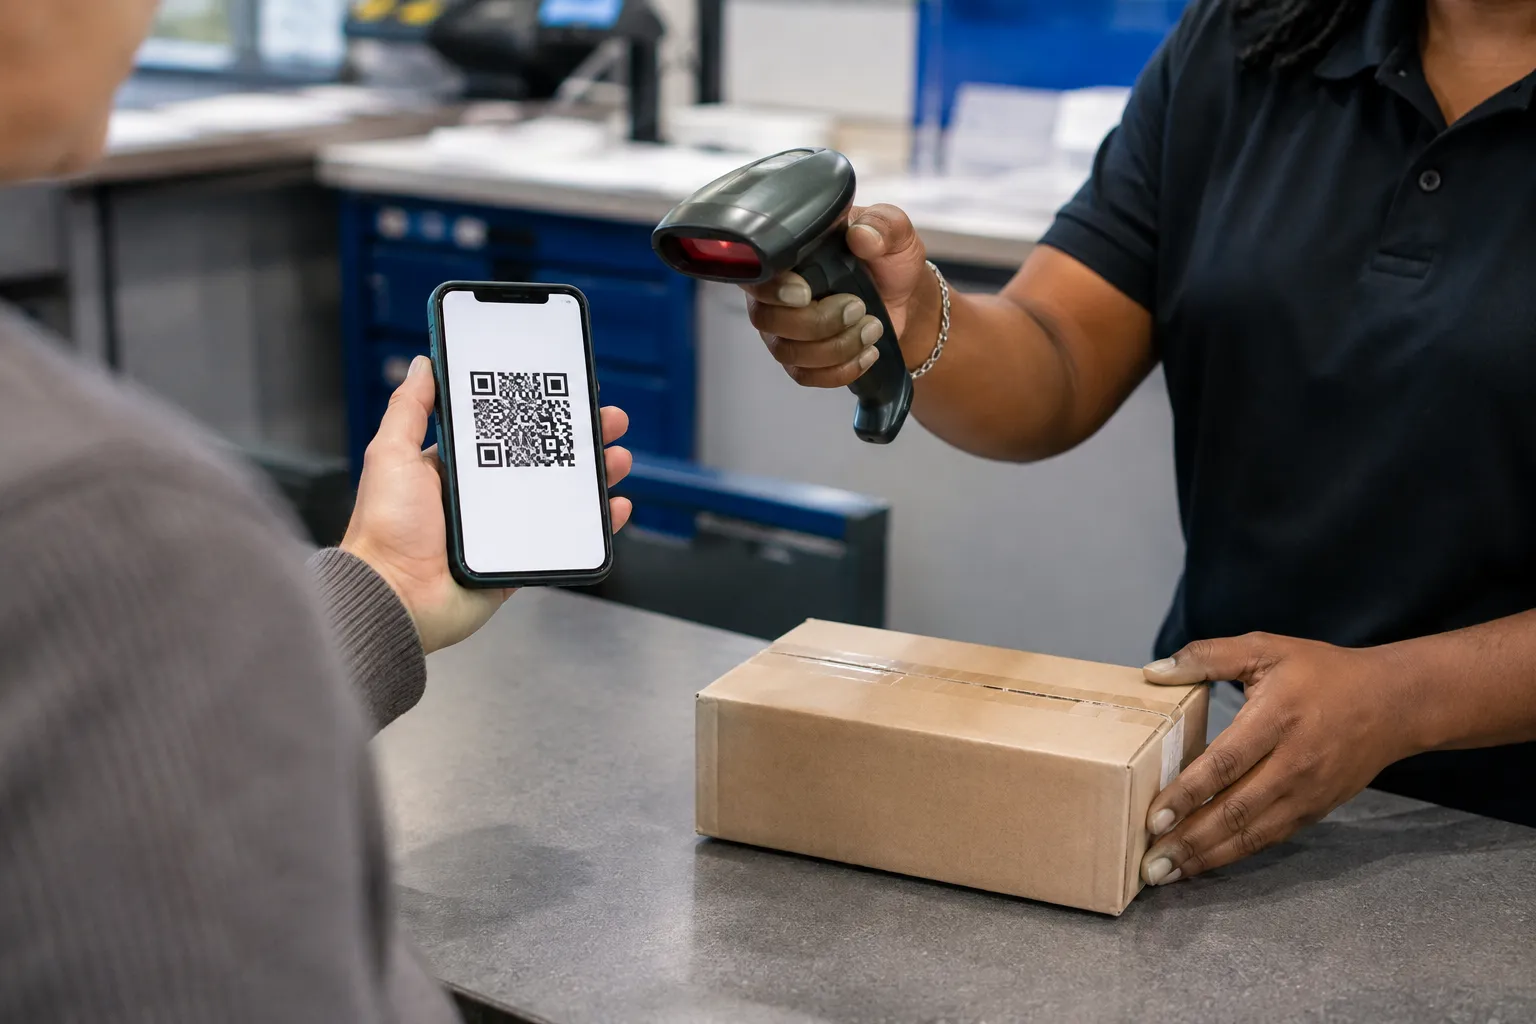
Whether a store hands you a QR code or makes you create a label varies by retailer, so it helps to check the store-by-store online return rules before you buy.
Limitation: QR drop-off works only at participating staffed locations, not at every unattended drop box, and only when the merchant offers it.
Who Pays for the Return Shipping Label?
Who pays for a return shipping label depends on the store’s policy, not the carrier. On a prepaid label the retailer covers postage, while a label you create yourself comes out of your pocket unless the seller reimburses you.
Stamps.com describes a pay-on-use return label that bills the merchant only when the label is actually scanned, which is why so many stores can offer prepaid returns at low risk.
Three payment models cover almost every case.
Prepaid: the retailer pays postage up front, and you just drop off. Common for defects and wrong items.
Pay-on-use, also called scan-based or bill-on-scan: still prepaid to you, but the store is charged only when the label is scanned.
Customer-paid: you buy the postage, typical for a change-of-mind return or a self-made label.
Payment model | Who pays | When you will see it |
|---|---|---|
Prepaid | The store | Defect, wrong item, or generous free-return policy |
Pay-on-use | The store, on scan | Most modern prepaid retailer returns |
Customer-paid | You | Change of mind, or a label you created |
In our August 2026 tests, a defect return shipped free on a prepaid label, while a change-of-mind return had a fee deducted from the refund, exactly matching each store’s stated policy.
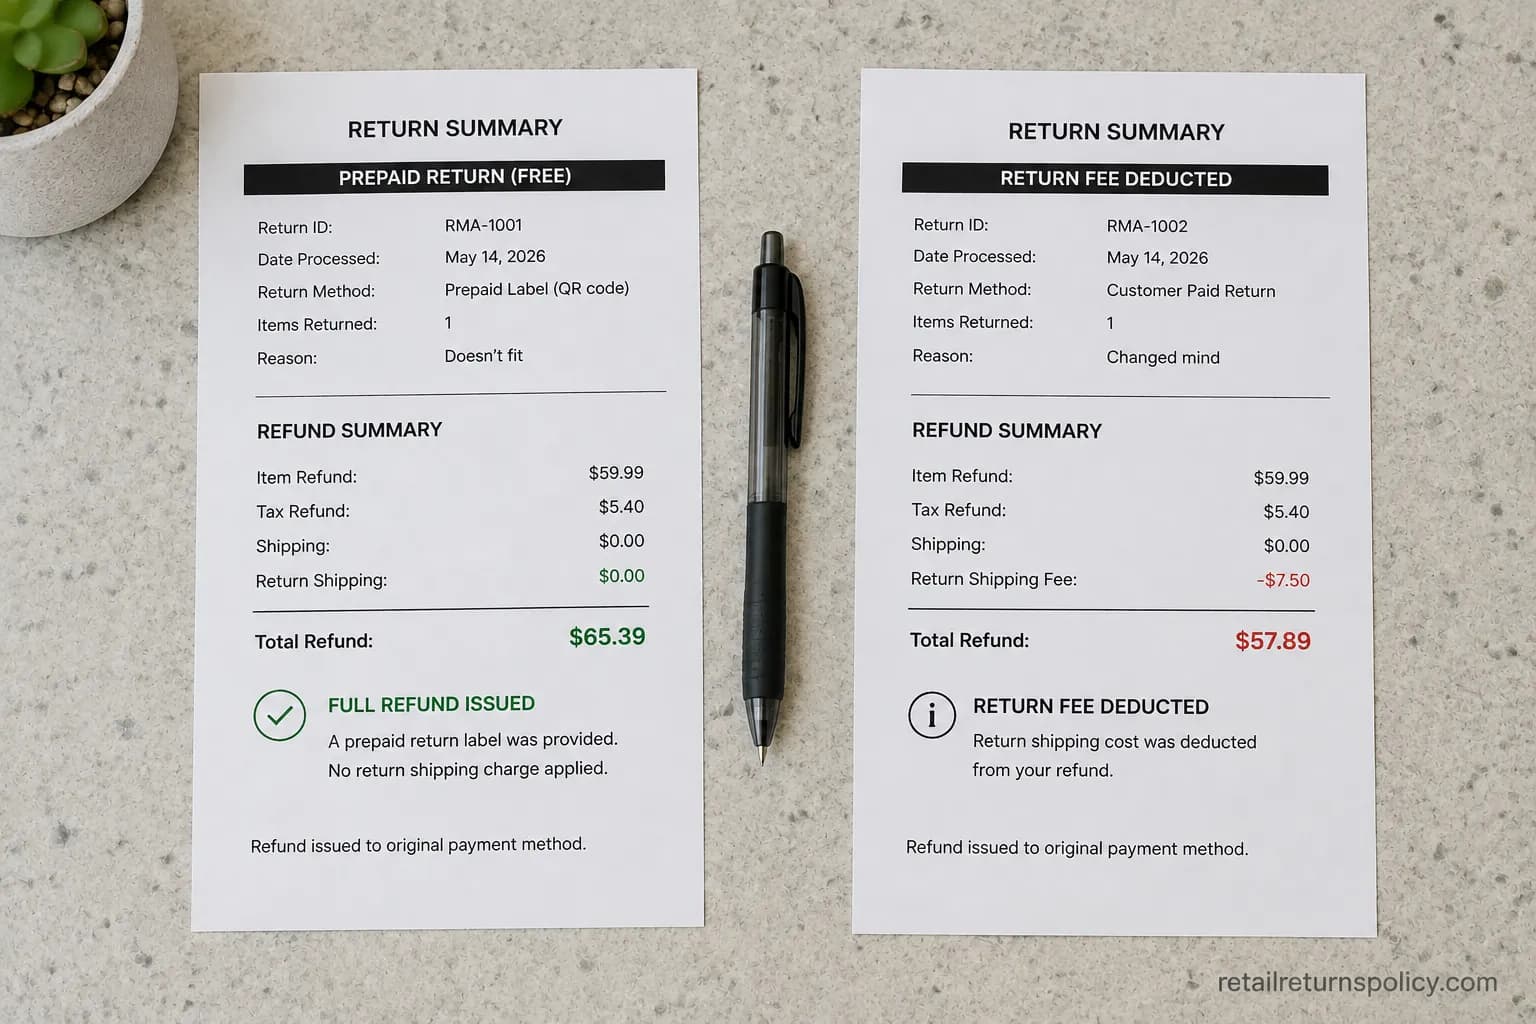
If free return shipping is what you care about most, here are the stores that still cover it versus the ones that now charge.
Trust note: free-return policies vary by retailer and are sometimes limited to paid members, so verify the terms before buying rather than after.
Label Won’t Print, Expired, or Only Shows a QR Code?
When a return label will not print, has expired, or shows only a QR code, the fix depends on the symptom, and each one takes a minute.
FedEx explains on its label management page that once you print a label you usually have about two weeks to use it, and if it has expired you simply create a new one rather than shipping on the old barcode.
Match your symptom below.
Symptom | Likely cause | Fix |
|---|---|---|
Only a QR code, no printable label | You picked a QR drop-off method by default | Cancel the return, restart it, and choose a “label required” method to force a PDF |
Label will not print or looks cropped | Browser or scaling issue | Print at 100 percent scale, or email the file to another device |
Label expired | Carrier or retailer time limit passed | Request a fresh label from the returns page instead of reusing the old one |
The QR-only case trips up the most people.
When our Amazon return showed only a QR code in August 2026, cancelling and re-selecting a “label required” method produced a printable PDF within seconds.
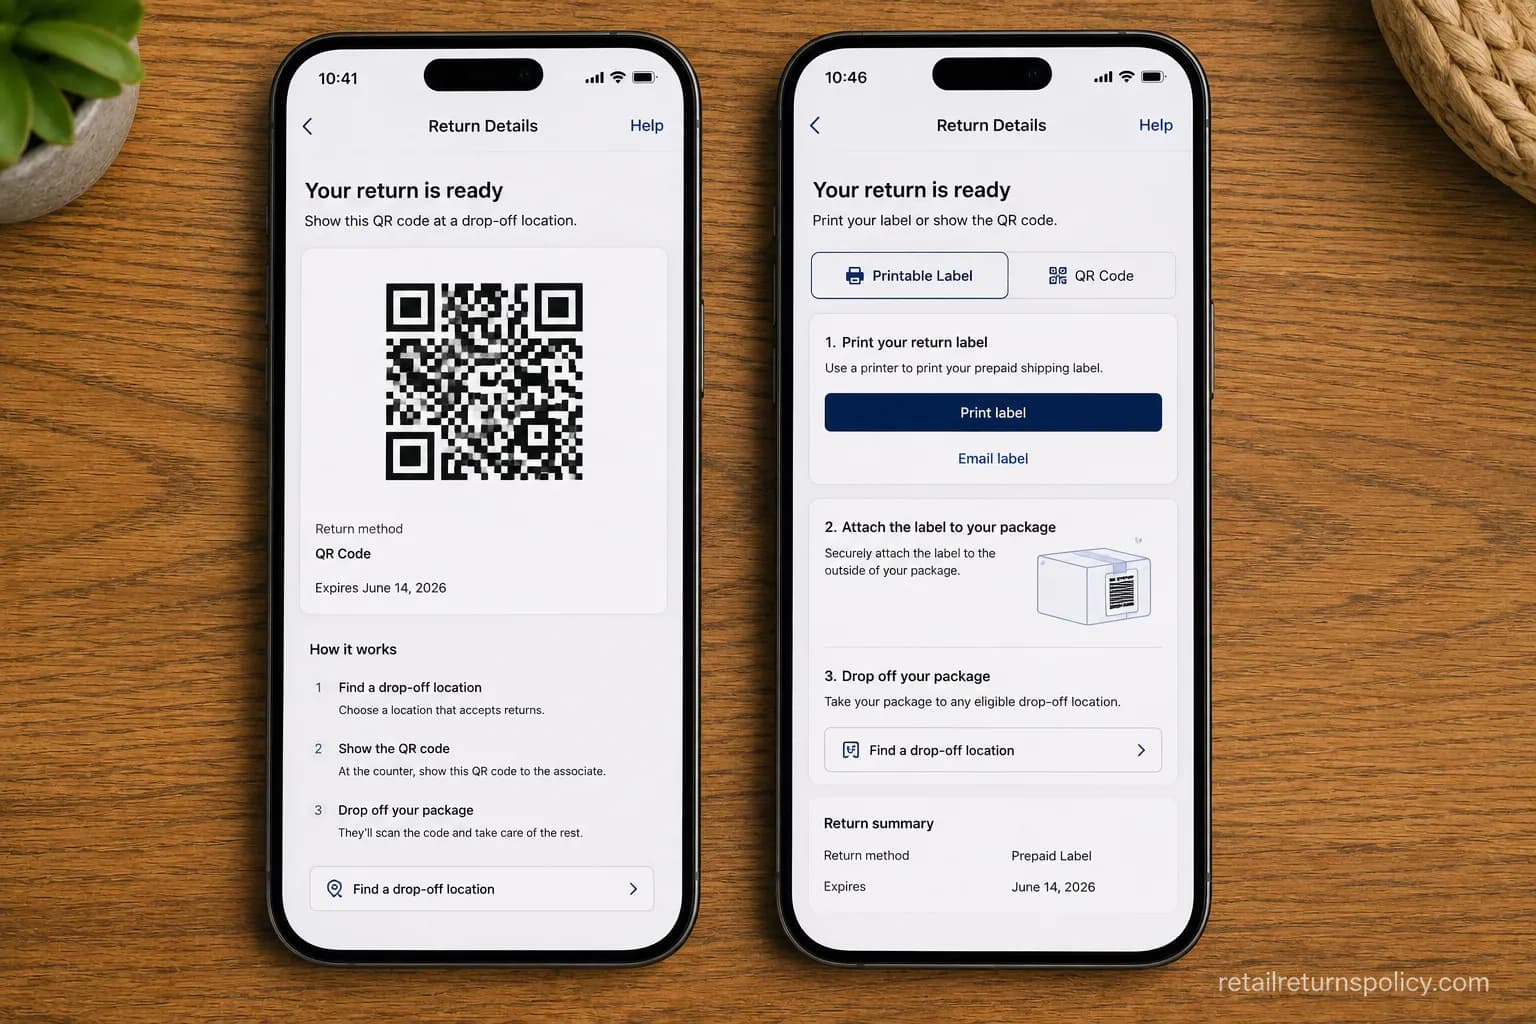
Reusing the original box is fine as long as it is sturdy, but cover or remove the old shipping label first so the carrier does not scan it by mistake.
Methodology note: exact expiration windows and postage prices change over time and by carrier, so treat any specific figure here as a starting point and confirm it at print time.
Frequently Asked Questions
How do I get a return label without a printer?
Start the return, choose a QR-code or “no label” option, and save the code to your phone. Bring the sealed package to a participating post office, UPS Store, FedEx counter, or drop-off retailer, and a clerk scans the code and prints the label for you. You leave with a receipt and no home printing required.
Who pays for a return shipping label?
On a prepaid label the retailer pays, which is standard for defects, wrong items, and stores with free returns. If you create your own label on a carrier site, you pay the postage unless the seller reimburses you. Change-of-mind returns are the most likely to cost you.
Do return labels expire?
Yes, and the window varies by carrier and retailer. FedEx notes that once printed you generally have about two weeks to ship, while retailer labels often last the length of the return window. If yours has expired, request a fresh one rather than shipping on the old barcode.
Can I print a return label at the post office, UPS Store, or Walgreens?
Often yes. USPS post offices and UPS Stores can print from a QR code or a label ID, and participating FedEx locations, including some Walgreens and Kohl’s, print from a retailer QR code. Bring the code on your phone and the sealed package.
What if my return label is missing?
Check your order history and your email, including the spam folder, since most stores post the label in both places. If it still does not appear, the item may have shipped from a third-party seller who sets its own terms, so contact that seller to request the label.
Can I reuse the box the item came in?
Yes, if the box is sturdy and undamaged. Remove or cover any old shipping labels so the carrier scans only your new return label, then tape the new label flat over the largest surface.
Knowing how to get a return label, in the end, is less about owning a printer and more about knowing which of the four routes your return uses, because the retailer usually makes the label and a QR code lets a counter print it.
Pick your route, save the label or the code, and once you have it, move straight to packing and drop-off.
That single shift, checking the store first and reaching for the QR code second, is what turns a frustrating errand into a two-minute stop.
Read it your way
Short on time? Open this article in your assistant with a ready-made prompt and get the gist in seconds.
Found this useful? Make us a preferred source so we show up in your Google results.
Keep reading
Related articles
Retailer Return Policy Hubs
Ulta Return Policy: 30 Days for a Full Refund (2026)
Return to Ulta within 30 days for a full refund; 31–60 days gets store credit. The Ulta return policy window, receipt rule, refund method and how to return.
Retailer Return Policy Hubs
Lululemon Return Policy (2026): Tested at 3 Stores
Check the lululemon return policy: 30-day window, receipt and tag rules, refund timing, exchanges, and no-receipt options, current for 2026
Retailer Return Policy Hubs
eBay Return Policy: Why “No Returns” Doesn’t Mean No Refund
Check the eBay return policy for 2026: the 30-day Money Back Guarantee, seller windows, who pays return shipping, and how to get a refund when a seller says no.
Retailer Return Policy Hubs
Sephora Return Policy: The 60-Day Rule Is Gone (2026)
Return Sephora products within 30 days for a full refund. Get the current Sephora return policy: receipt rule, opened items, refunds by payment method.
The discussion
Comments
Every comment is reviewed before it goes live.